Recording a Screen Capture Video

Digital Skills Services
Last Update 12 saat önce
The Kaltura production tools include Kaltura Capture, a screen recorder that allows you to record all or part of your screen/monitor, while you are simultaneously recording audio- often your narration through a microphone- and, if desired, a second screen or a webcam feed. Screen capture videos include all your mouse movements, and can be an effective way to demonstrate how to use or configure software, navigate a website or your MyCanvas course, or present a narrated presentation. You can also choose to record two webcams simultaneously.
Kaltura Capture is an application that you will download and install on your computer. Once installed, you can access this recorder from My Media or directly from the desktop app. The app configuration is specific to you, and any media that you create with Capture will upload to your My Media.
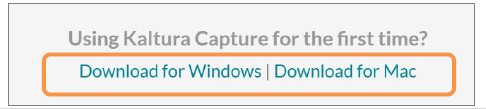
1. Enter My Media, press/click Add New, and select Kaltura Capture. The first time you access Kaltura Capture, you may need to download the app via the download link.
2. Once installed, Kaltura Capture can be launched via the Add New button in My Media, or as a regular local desktop application.
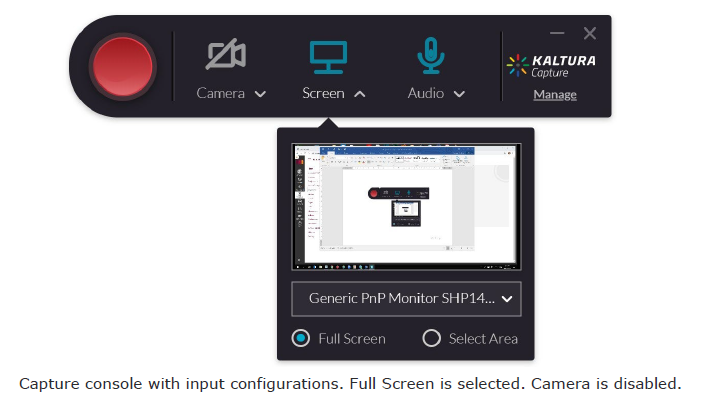
3. Once the app loads, configure the video and audio settings:
• For Camera, use the dropdown selector to select the webcam or second screen to use, or press/click the camera button to disable the camera.
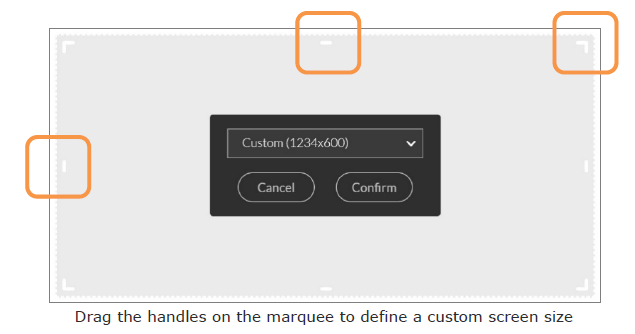
• For Screen, use the dropdown selector to select the monitor you wish to record, and choose Full Screen, or Select Area to define a section of the screen. Note that you can choose preset sizes, or a custom size. Careful size choices can focus attention and minimize visual distraction.
• For Audio, use the dropdown selector to select the microphone to use, or press/click the audio button to disable audio recording.
4. Also on the recorder, follow the Manage link, and choose the settings (gear) link to confirm your recorder preset settings. Accept the defaults if in doubt and press/click Save. If you have slow Internet upload speeds, you may choose to lower the quality (size) settings.
5. When you are ready, press/click the red Record button. After a 3 second countdown, the recorder console will minimize and recording will begin.
6. During the session, the sources that you selected will be recorded simultaneously, including any mouse movements on the screen.
7. Selecting the pencil (edit) button on the recording console will open a set of annotation tools that you can use in real time to:
• Draw freeform lines and arrows, and type text
• Choose annotation line thicknesses and colours
• Delete annotations
• Launch a movable whiteboard
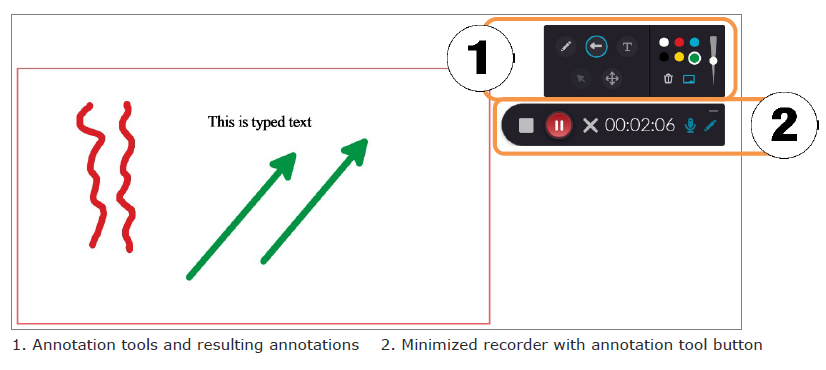
8. Still within the annotation tools, click the Cursor button to return to cursor mode. Note that you can leave the annotation tool open for quick access, preferably outside the area that you selected to record.
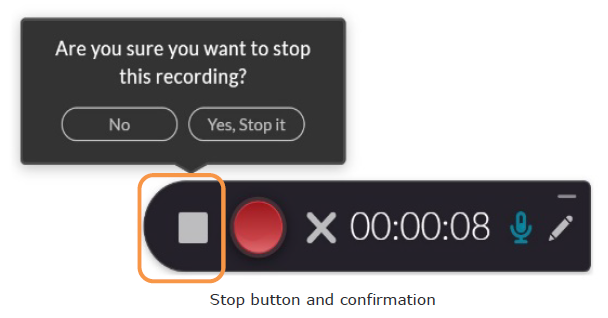
9. When the recording is complete, press/click the Stop button on the recorder console. Confirm by clicking/pressing Yes, Stop it.
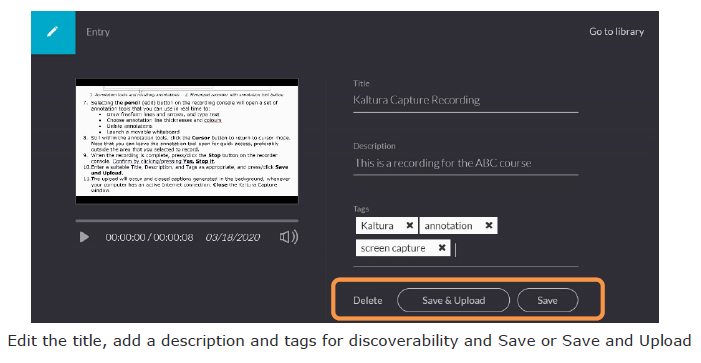
10. This takes you to the Details page for your new video. Enter a suitable Title, Description, and Tags as appropriate, and press/click Save and Upload.
11. The upload will occur and closed captions generated in the background, whenever your computer has an active Internet connection. Close the Kaltura Capture window.
Creating a Narrated and Annotated Video of a PowerPoint Presentation
Often, you’ll want to use a screen capture program to record a presentation and your voice, in real time, creating a narrated video showing your slides, your mouse movements, and any annotations that you add. Kaltura allows you to add, as a secondary source, images, PowerPoint and PDF slides to accompany the screen information that you’ve recorded. Any slides that you add will function as chapter markers. When you record a PowerPoint presentation in Slide Show (full screen) mode, the chapters are created automatically.
1. Using Kaltura Capture as described in Recording a Screen Capture Recording (above), record your presentation. When recording a PowerPoint or PDF file, you may choose to view them in full-screen. If your intention is to use the annotation tools, be sure to record only a portion of the screen, and/or position the tool panel so it is not recorded.
2. Once the video has processed and is available in My Media, click/press the preview image or title, and under Actions select Launch Editor. Make any edits to the recording as desired.
3. Under Actions, select Edit, and choose Timeline.
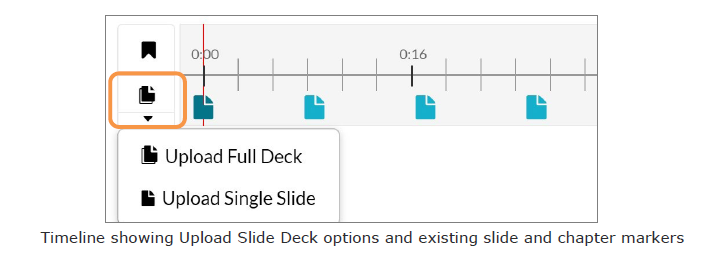
4. Click/press the Upload Slides Deck button, or the dropdown just below it to specify a Full Deck or a Single File. Note that a single file can include image files.
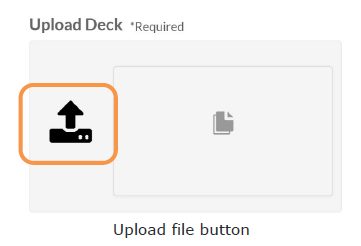
5. Choose Upload Full Deck, and then click/press the upload button to locate or drag and drop the slide deck that served as the presentation for your screen recording.
6. Once the file has loaded, you’ll be returned to the chapter editor. While viewing the video, drag the blue slide indicators to appropriate spots on the timeline. Note that you can edit the Slide Information and descriptions if you wish.
7. Click/Press View in Player or return to My Media to preview your video. Note that your images or PowerPoint slides are now available in a secondary window, and that each slide also serves as a chapter marker in the chapter menu.