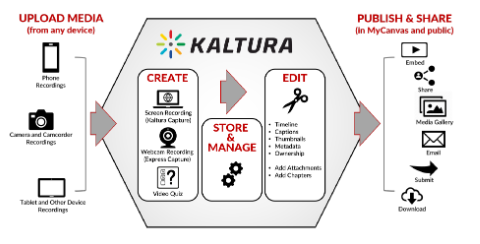
Kaltura Introduction and Basic Workflow

Digital Skills Services
Last Update 14 ชั่วโมงที่แล้ว
Entry to the Kaltura suite of tools is via the My Media link on your course navigation menu, where you can access all the media that you’ve uploaded or created in all of your courses, and find tools to upload, edit, tag, chapter, and manage all your media.
My Media also includes a powerful suite of media recording and production tools, for the recording of quality webcam videos, the creation of video quizzes, and the development of multi-source annotated screen capture videos. Any media created in, or uploaded to Kaltura is machine captioned by default. Media stored in My Media can be quickly published to a course’s Media Gallery to provide student access. In addition, media can be easily embedded in Announcements, Quizzes, Assignments, Discussions, Pages, etc. and located in optimal locations within Modules.
There are advantages to using Kaltura as your singular media platform within MyCanvas, not just for its production capabilities but also for one-stop media management functions. While MyCanvas does offer a simple webcam recorder and media uploader, the resultant files are not easily editable or captioned, and cannot be readily enhanced or modified.
My Media contains all your uploaded and Kaltura-created media, and is your access point for all Kaltura tools. My Media content and tool access is consistent across all your courses, while the Media Gallery contains only media that you have specifically published to that course.
Regardless of the course from which you access it, My Media contains only your personal media, and unless you choose to share, all the content in My Media is private.
For example, a student who accesses My Media in a course that you have developed or are delivering will not see your media entries, but will see their own. If the student chooses to upload a file, or create a Kaltura Capture or Express Capture video via that same My Media link, the resulting videos will be stored in the student’s My Media. My Media is personal.
1. To access your videos and use the Kaltura tools, enable My Media on the course navigation menu. If you are expecting students to use Kaltura to create or upload media for assignment submissions in your course, you should enable My Media.
2. Consider enabling the Media Gallery as well, to provide an easy way for students to view all the course-related media.
3. To create new media or to upload existing media, enter My Media, and press/click Add New.
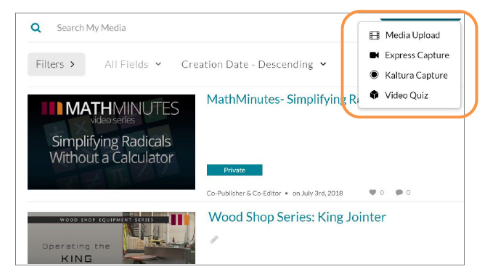
Select Media Upload to select a local media file. Drag-and-drop or Choose a file to upload. Uploaded media is Private by default.
• The easiest way to transfer a media file from your phone or tablet to My Media is using the Canvas Student app, available from Google Play and the App Store.
• If you are transferring a file from a camcorder, GoPro, or other device, the easiest way may be to use a USB cable connection.
• Select Express Capture to record a video using a local webcam or USB camera. (described later)
• Select Kaltura Capture to record a screen capture recording. (described later)
• Select Video Quiz to create a video quiz based on an existing video. (described later)
4. Once the media has been uploaded or created, it is visible and accessible as an asset in My Media. Depending on its file size, it may take a few minutes before it can be accessed and played.
5. In My Media, click/press on the media’s preview image or title in order to:
• View the file, and its transcript
• Add a description
• Customize, access and copy the embed code
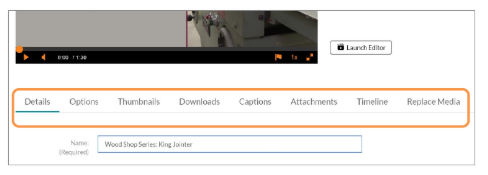
6. Under Actions > Edit, you can enhance the media:
• Edit the title and modify, select, or generate a new thumbnail image
• Upload or edit captions and add attachments (described later)
• Create chapter points in the video and synchronize them to an uploaded slides deck or images (described later)
To make the media public and to quickly share it with students in the Media Gallery:
- Return to My Media and select the video by checking its selector box.
- Under Actions, select Publish.
- Press/click the Published radio button, select any course(s) in which you’d like to publish the media, and press/click Save.
- Visit the course’s Media Gallery to confirm the student availability of the media. Note that you can also add My Media files, or create Kaltura media, from within the Media Gallery using Add Media.
8. When users view Kaltura videos, they will see the overlaid captions and the full text transcript below the video window. Users can search for and click on any word in the transcript to instantly move the playhead to that time on the video timeline.